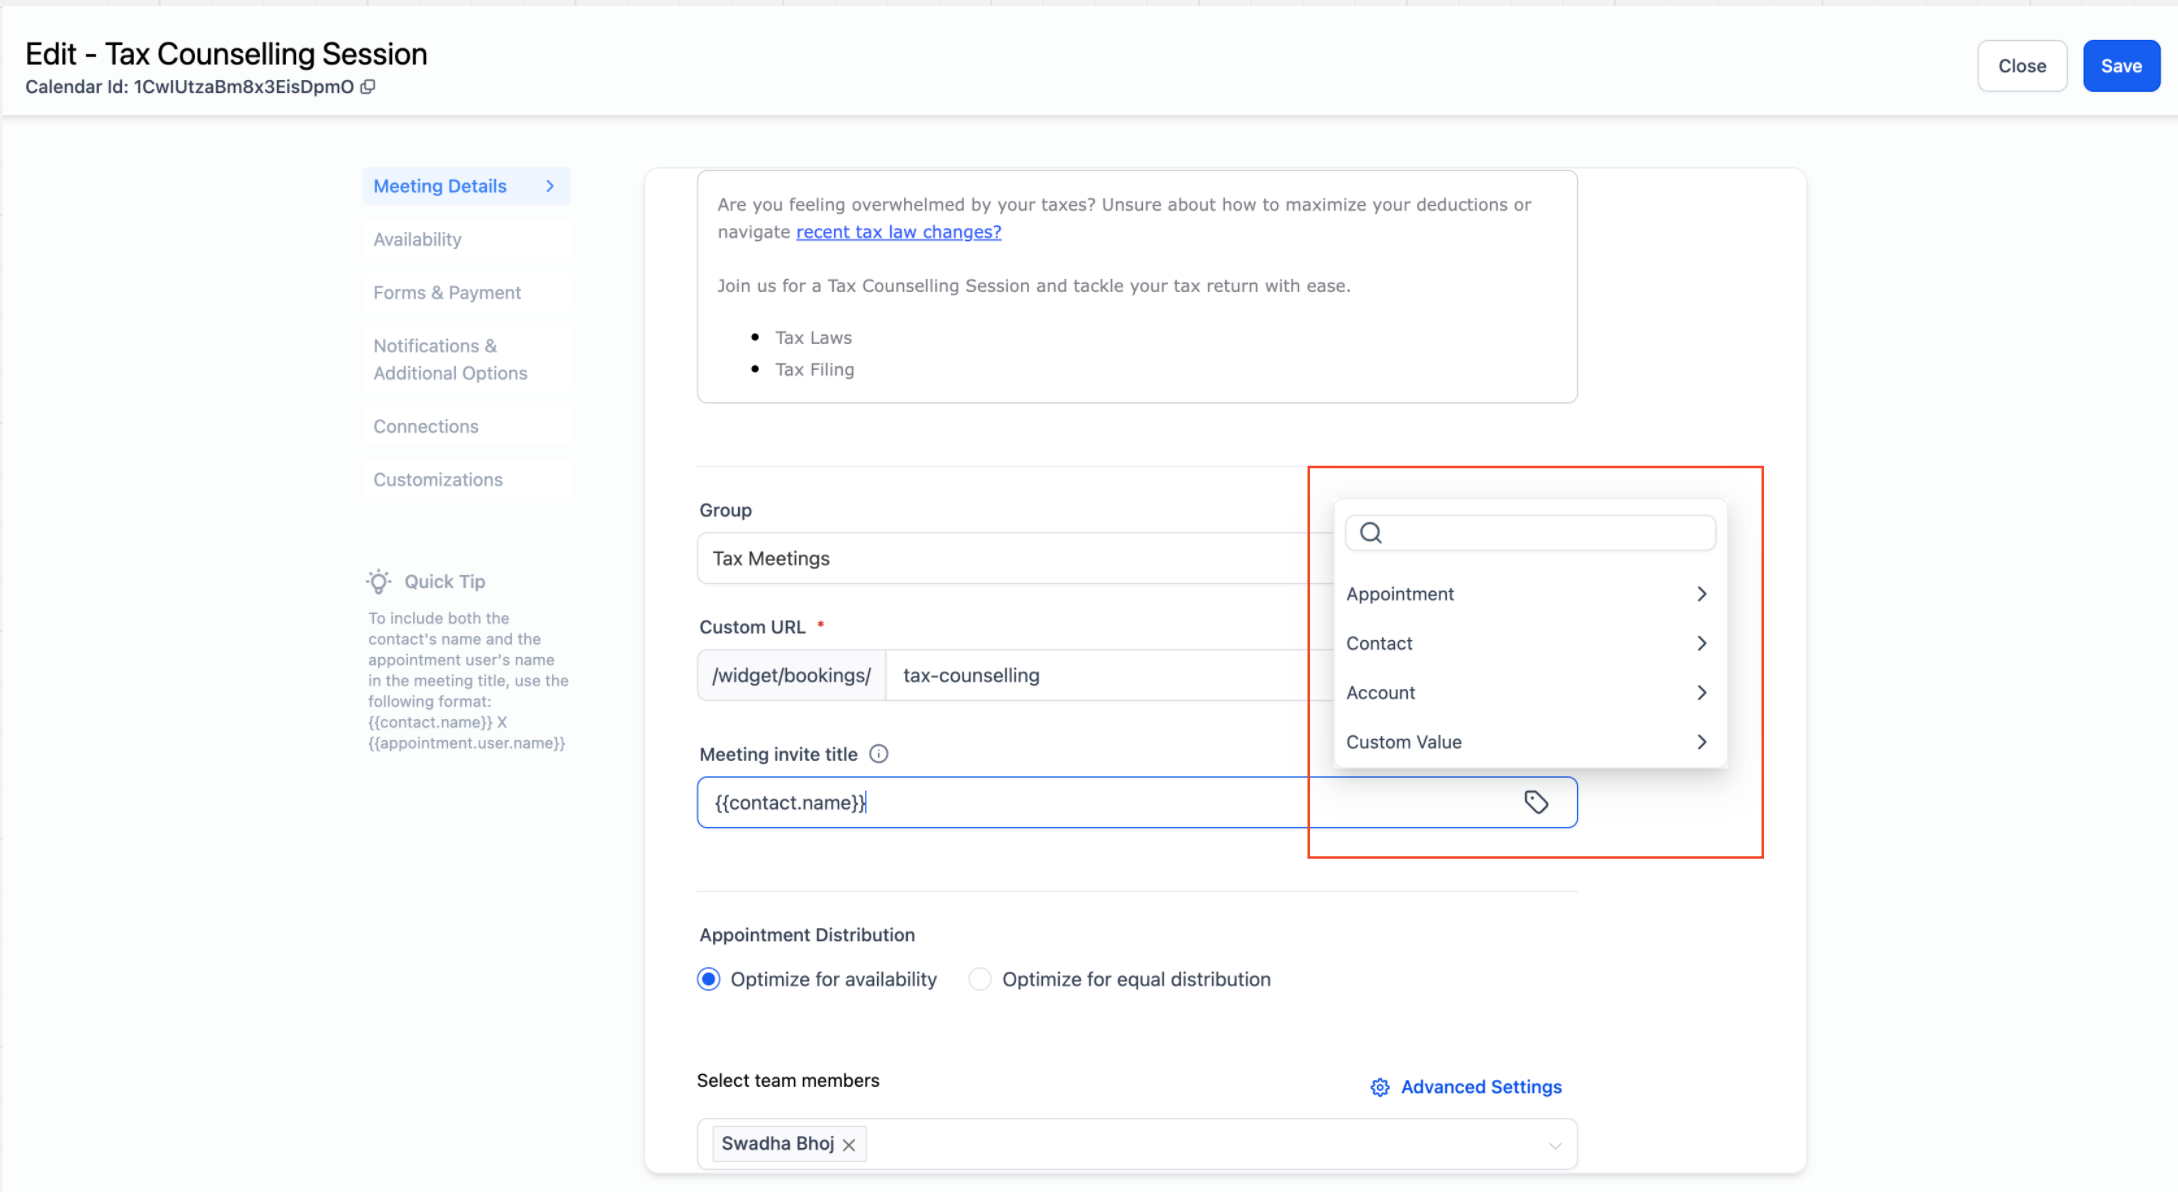
We’ve extended support for custom values across multiple fields in calendar settings and also introduced a Custom Value Selector to make it easier for users to add custom values without needing to manually type them out, reducing the chances of errors and simplifying the
Now, directly from Calendar settings, users can quickly select supported custom values for various fields like:
- Calendar Name
- Meeting Invite Title
- Custom Meeting Location
- Additional Notes
- Thank You Message on the Confirmation Page
How to Use?
- Go to Calendar Settings and select the desired calendar.
- Navigate to the input field where you want to add a custom value.
- Click on the Custom Value Selector and choose your desired value.
- Click Save to apply the changes.