This article will walk you through the full process of creating your Send In Blue account. Keep in mind, SendInBlue is NOT an email routing and tracking application. It is a 3rd party email marketing software.
Step 1: Select a Plan and Create an Account at www.sendinblue.com. Send In Blue has a variety of plans available, from as low as $0 (a trial account) to $65 a month. We're going to walk you through what each plan offers:
- Trial: Great to test it out, not great for a functioning business
- $25/Month: Send & receive up to 10,000 emails. Good option for smaller business.
- $65/Month: Send & receive up to 20,000 emails. Best solution for marketing pros. Includes Facebook and retargeting ads, marketing automation, up to 20 landing pages, and up to 10 users.
- Enterprise plan: a customized solution if you're looking for more than the above. You have the option to fully customize a plan based on your business needs.
NOTE: None of the above plans include a dedicated IP address which can impact successful email deliverability.
Step 2: Create your subdomain in SendInBlue.
- Log in to your SendInBlue account and your DNS manager (Godaddy, Cloudflare, etc)
- Select the domain you want to use for SendInblue from a domain you already own or have purchased (helpdesk.com). You will set-up a subdomain (mg.helpdesk.com) for SendInBlue so it's ok to choose a domain that is already being used.
- Navigate to the 'Senders and API's' tab within SendInBlue and select 'Domains'
- Create a subdomain such as mg.yourdomain.com or replies.yourdomain.com and enter it in the Domain Name field.
- Click Add Domain
- Verify the domain by adding a record to your DNS manager and clicking the button
Step 3: Setup the Subdomain Records in Your DNS Manager

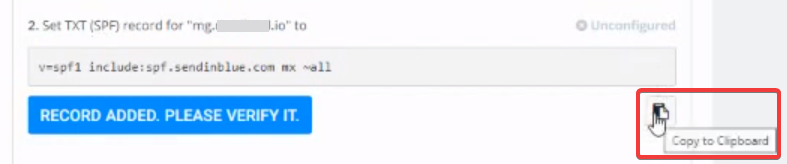
- In SendInBlue, you will see the DNS entries; 3 TXT records and a TXT (SPF) record. Go into your DNS manager where you will set up the DNS entries.
- Navigate to the DNS record section for the domain you are using within SendInBlue. You will now set up the 4 DNS records to ensure proper sending, replies and tracking. Follow directions in SendInBlue. Records are unique to your domain and SendInBlue account.
- After adding and saving all 4 records, click "Record Added. Please Verify" next to each record within SendInBlue. All 5 should have the green check mark. If any do not, check the record and re-attempt.
Here is a screenshot walkthrough of this process:

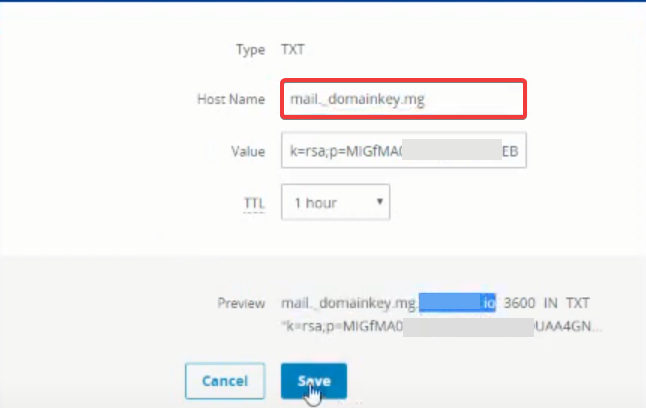


NOTE: If the green check marks are not showing up, you'll want to ensure that the Host pieces for each record only have the sub-domain piece of the total record. For example, if the total record is mailto._domainkey.mg.mydomain.com, you would only put in mailto._domainkey.mg
Step 4: Add SendInBlue as your Email Provider
- Navigate to your Account Settings > Select Email Services
- Select 'Add Provider'
- In SendInBlue, navigate to the 'SMTP & API' tab and select SMTP
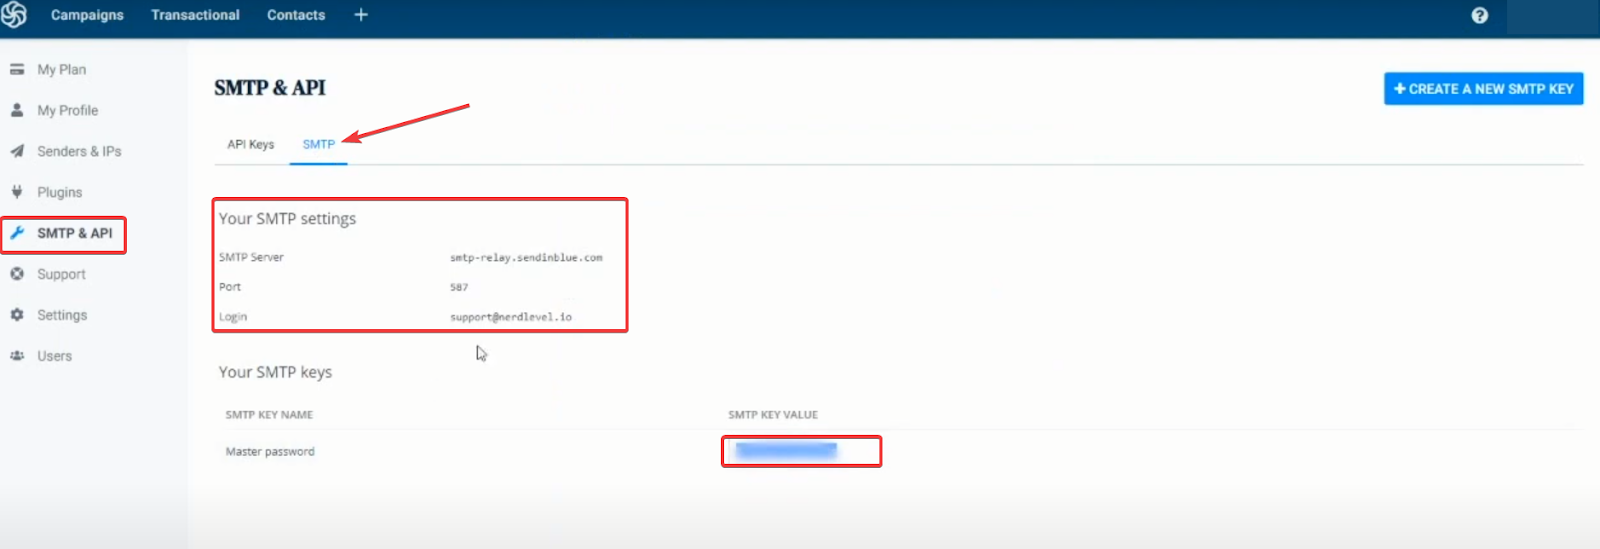

- Enter the information from SendInBlue into your account.
Save to confirm your changes.