Introduction
The "Copy Contact" action within the Workflow Builder of the CRM is designed to offer flexibility and enhanced capabilities for contact management. This highly requested feature enables users to copy contacts from one sub-account to another, seamlessly. The action simplifies processes such as lead distribution and allows you to customize what data is copied over to the new account.
Why Use "Copy Contact"?
Lead Distribution: Easily distribute leads to different sub-accounts based on conditions or actions.Create a workflow that checks for certain lead qualifications and then uses the "Copy Contact" action to distribute the qualified leads to various sub-accounts for further nurturing.
Streamlined Processes: Eliminates the need for complex workarounds like using webhooks or third-party integration tools.
Data Segregation: In instances where you have sub-accounts dedicated to specific departments or projects, you can copy relevant contacts to these sub-accounts while retaining their original data tags and custom fields.
How to Set It Up
Prerequisites
Make sure you have access to premium workflow triggers and actions. If not, go request your Agency Admin to enable them.
Steps to Follow
Access the Workflow Builder: Navigate to the Workflow Builder in your Automations tab.

Create or Edit Workflow: Create a new workflow or edit an existing one where you'd like to add the Copy Contact action.
Add New Action: Click the little '+' symbol to add a new action to your workflow.
Select 'Copy Contact': Scroll through the actions and find 'Copy Contact'. It will have a golden crown icon to indicate that it's a premium feature.
Configure Action Settings:
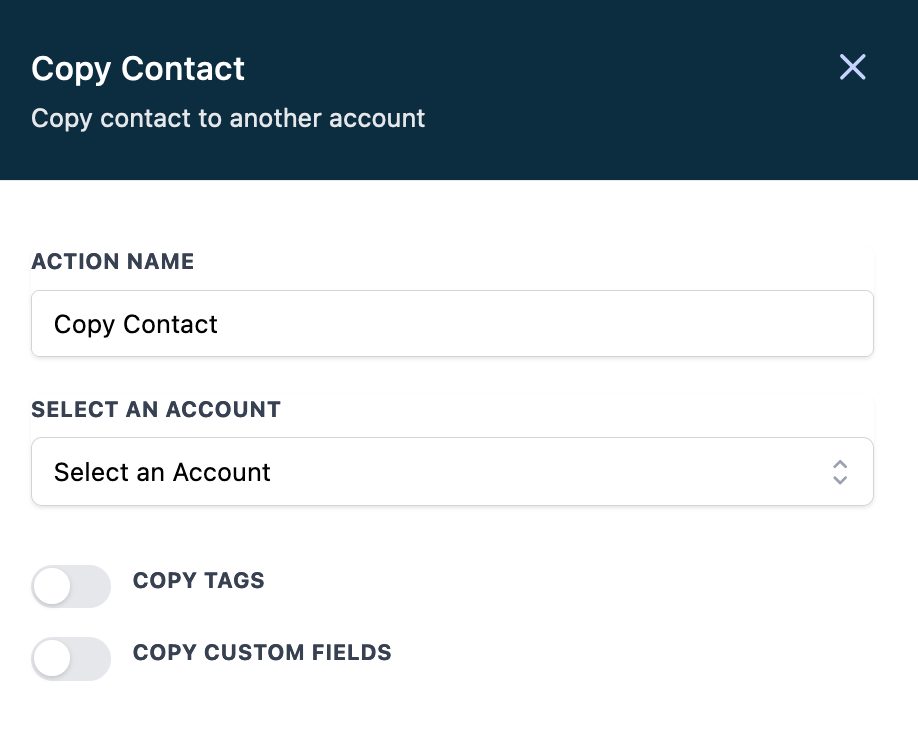
Name Your Action: Give the action a descriptive name, for example, "Copy from Account A to Account B."
Select Target Sub-Account: Choose the sub-account where you want to copy the contact.
Copy Tags: Optionally, toggle on the switch to copy tags associated with the contact.
Copy Custom Fields: Optionally, toggle on the switch to copy custom fields associated with the contact.
Save Action: Click "Save Action" to apply the changes.
Test the Workflow: It’s advisable to run a test to make sure everything works as expected.