This tutorial will walk you through the process of creating a product to be sold in your online store or funnel.
How to create a product
- Navigate to Payments > Products:
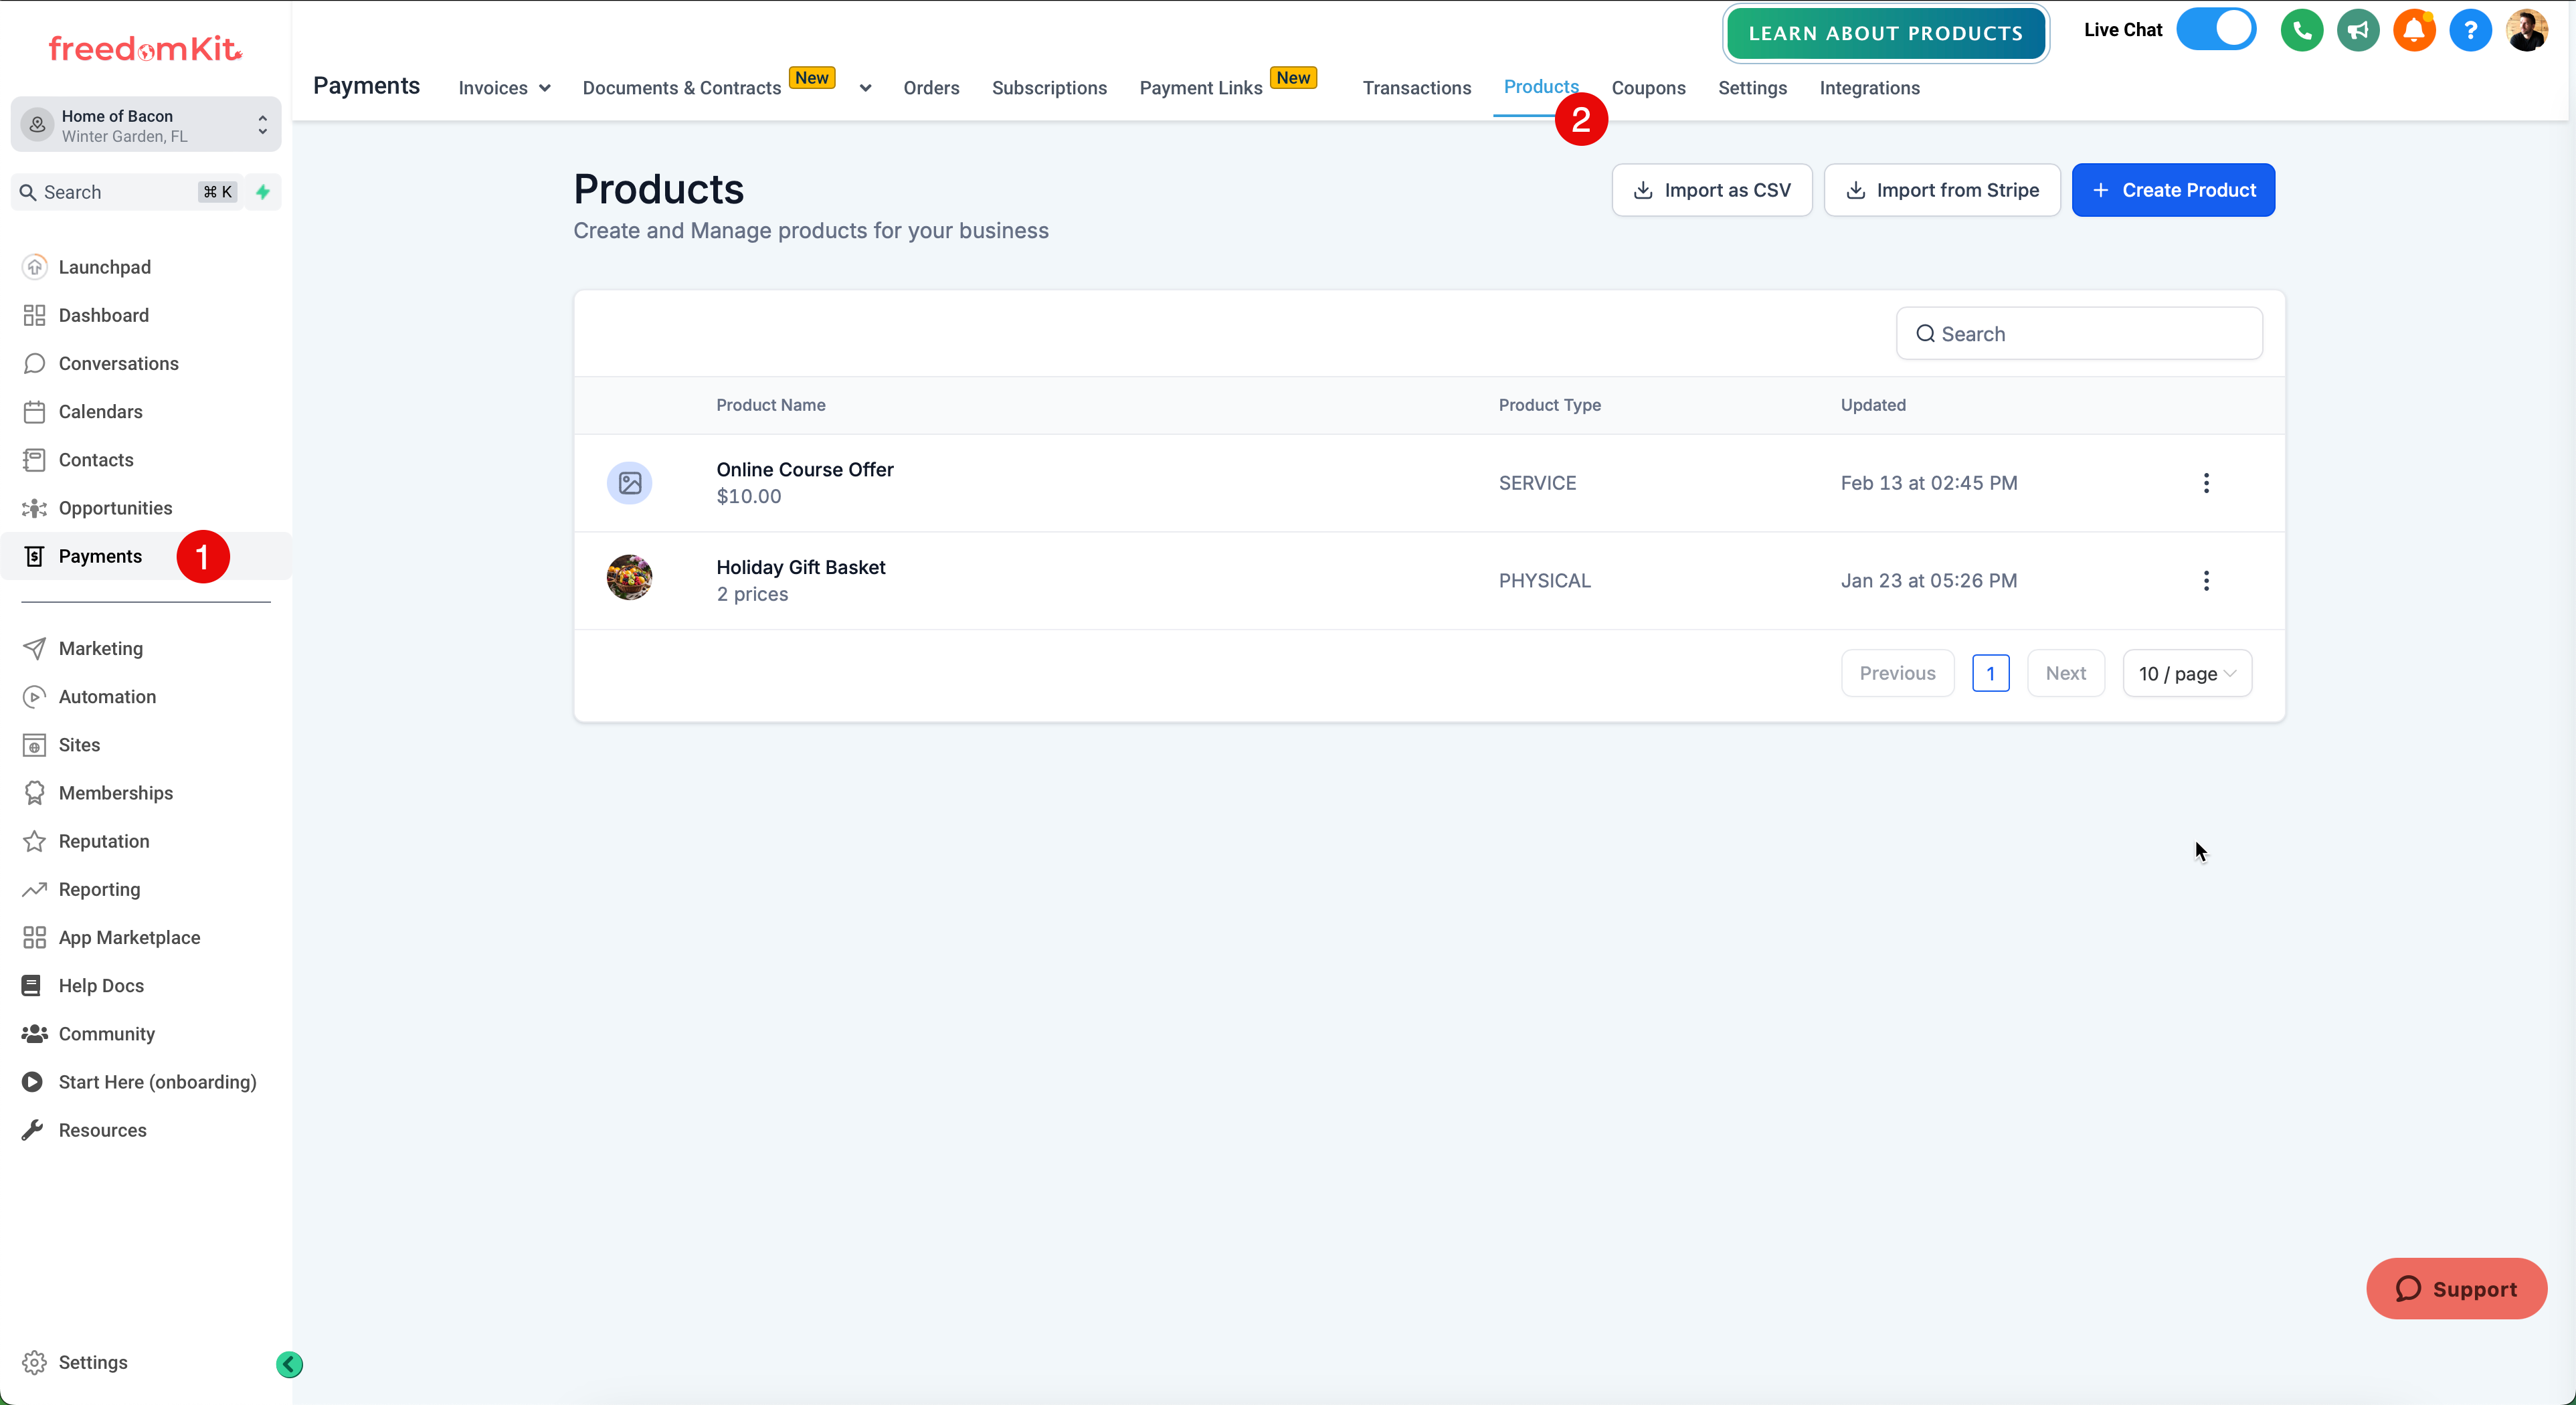
- Click "Create Product"
Product Options
You will be presented with several product options, which will be discussed in depth throughout this article.
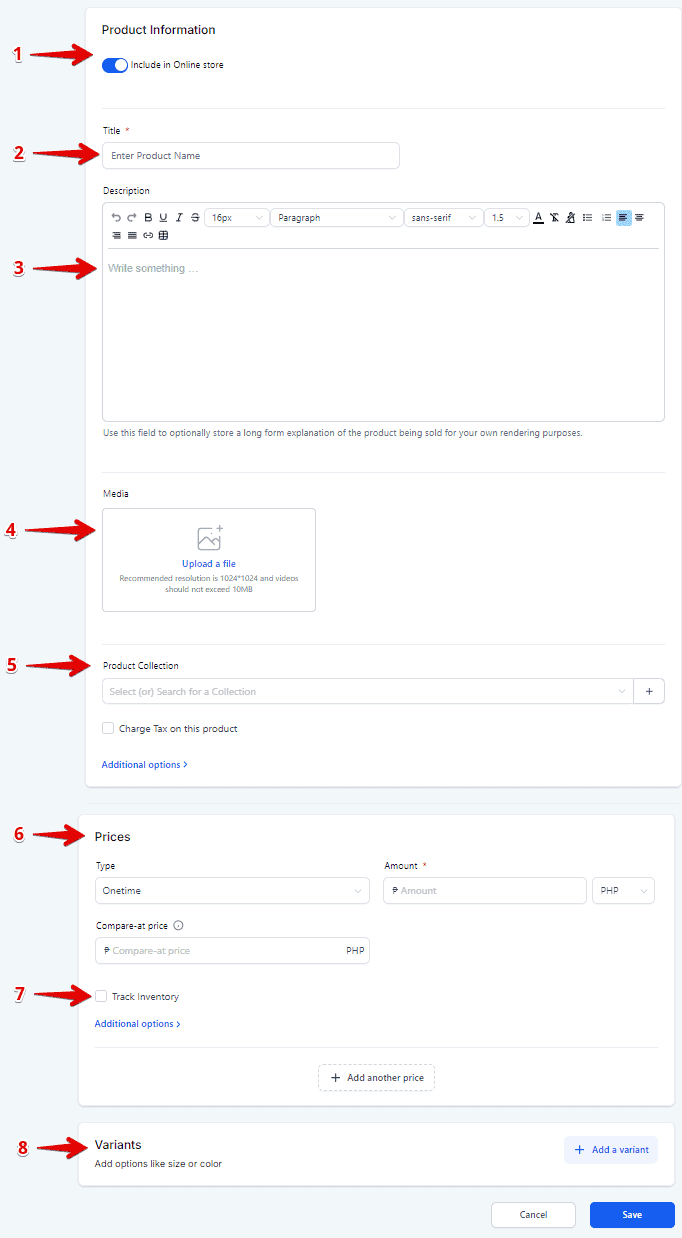
1. Include in Online Store
Some products are best browsed and purchased in an online store. Some products are better to keep hidden and only sell through specifically crafted sales funnels. This toggle switch will allow you to choose the visibility of your product.
2. Product Name
This is the product name that will be visible from your online store as well as on checkout forms whenever selling the product.
3. Product Description
This is your main description to describe the product. You can add formatting, tables, and other methods of attracting desire to your product.
4. Media
You can attach as many images to your product as you'd like in order to make it attractive to your prospect. Simply upload images to your media gallery and double click on them to add to the product listing. You can choose one image to be "Featured" meaning it will be the initial image shown to customers.
5. Product Collection
Business users now have the ability to assign to products to different collections for easy navigation in online stores This is available as an option for existing as well as new products under Payments -> Products
This solves a lot of challenges in providing easy navigation to customers on online stores, specially for businesses who deal with a lot of products falling into different categories
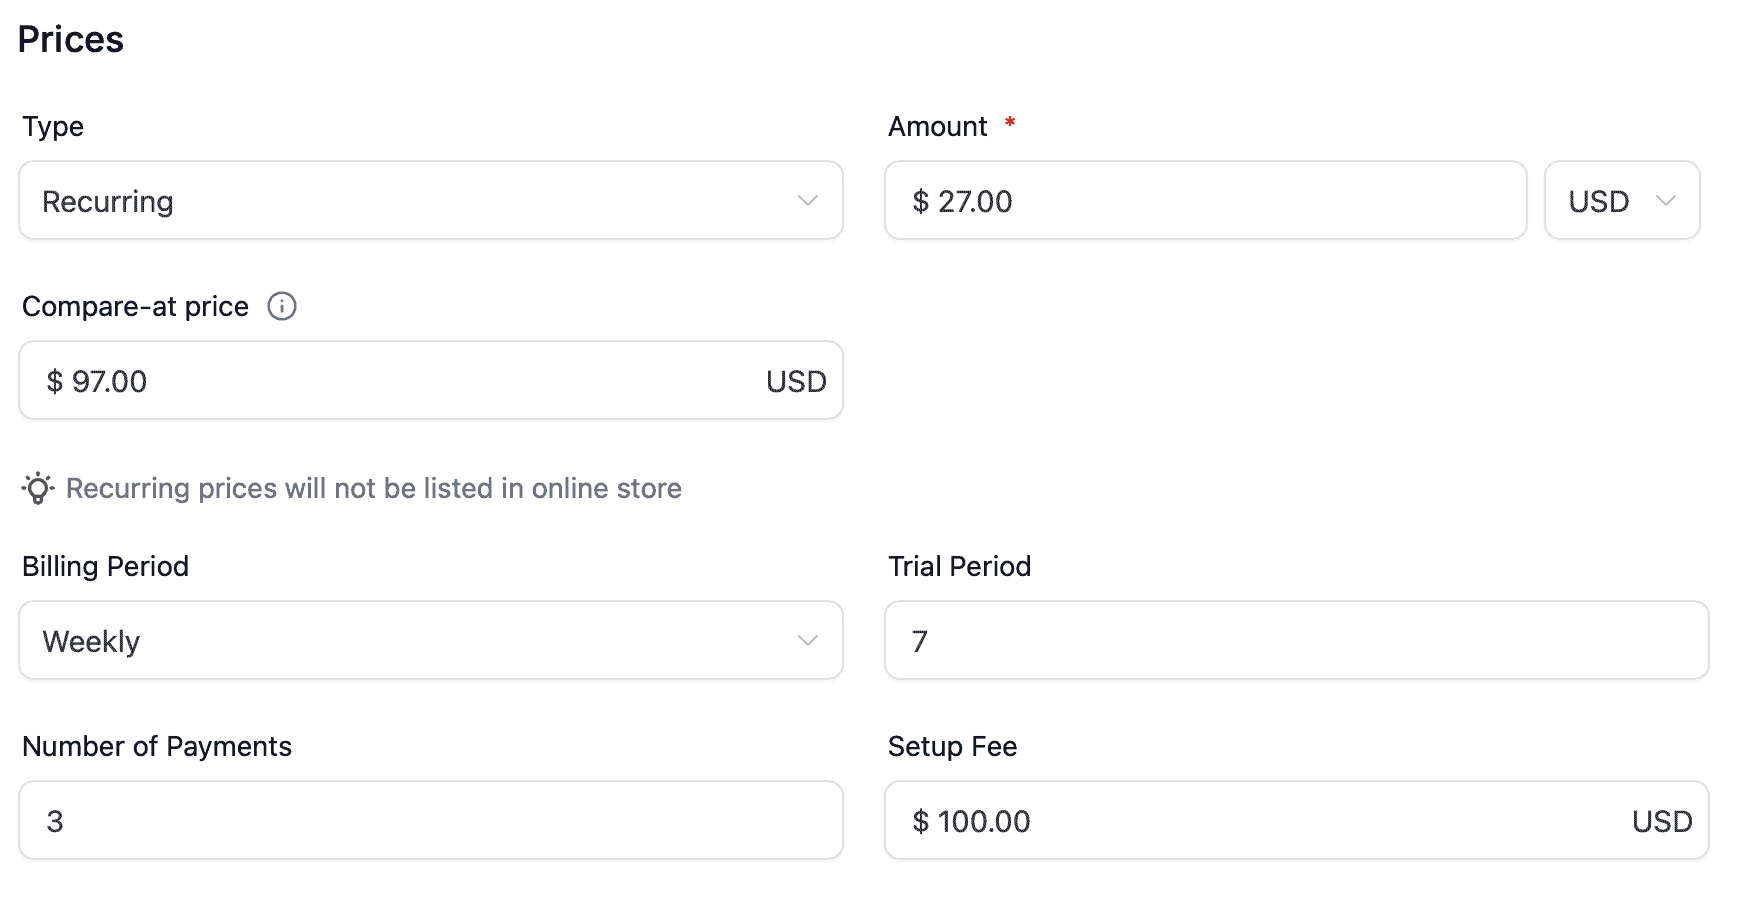
6. Pricing
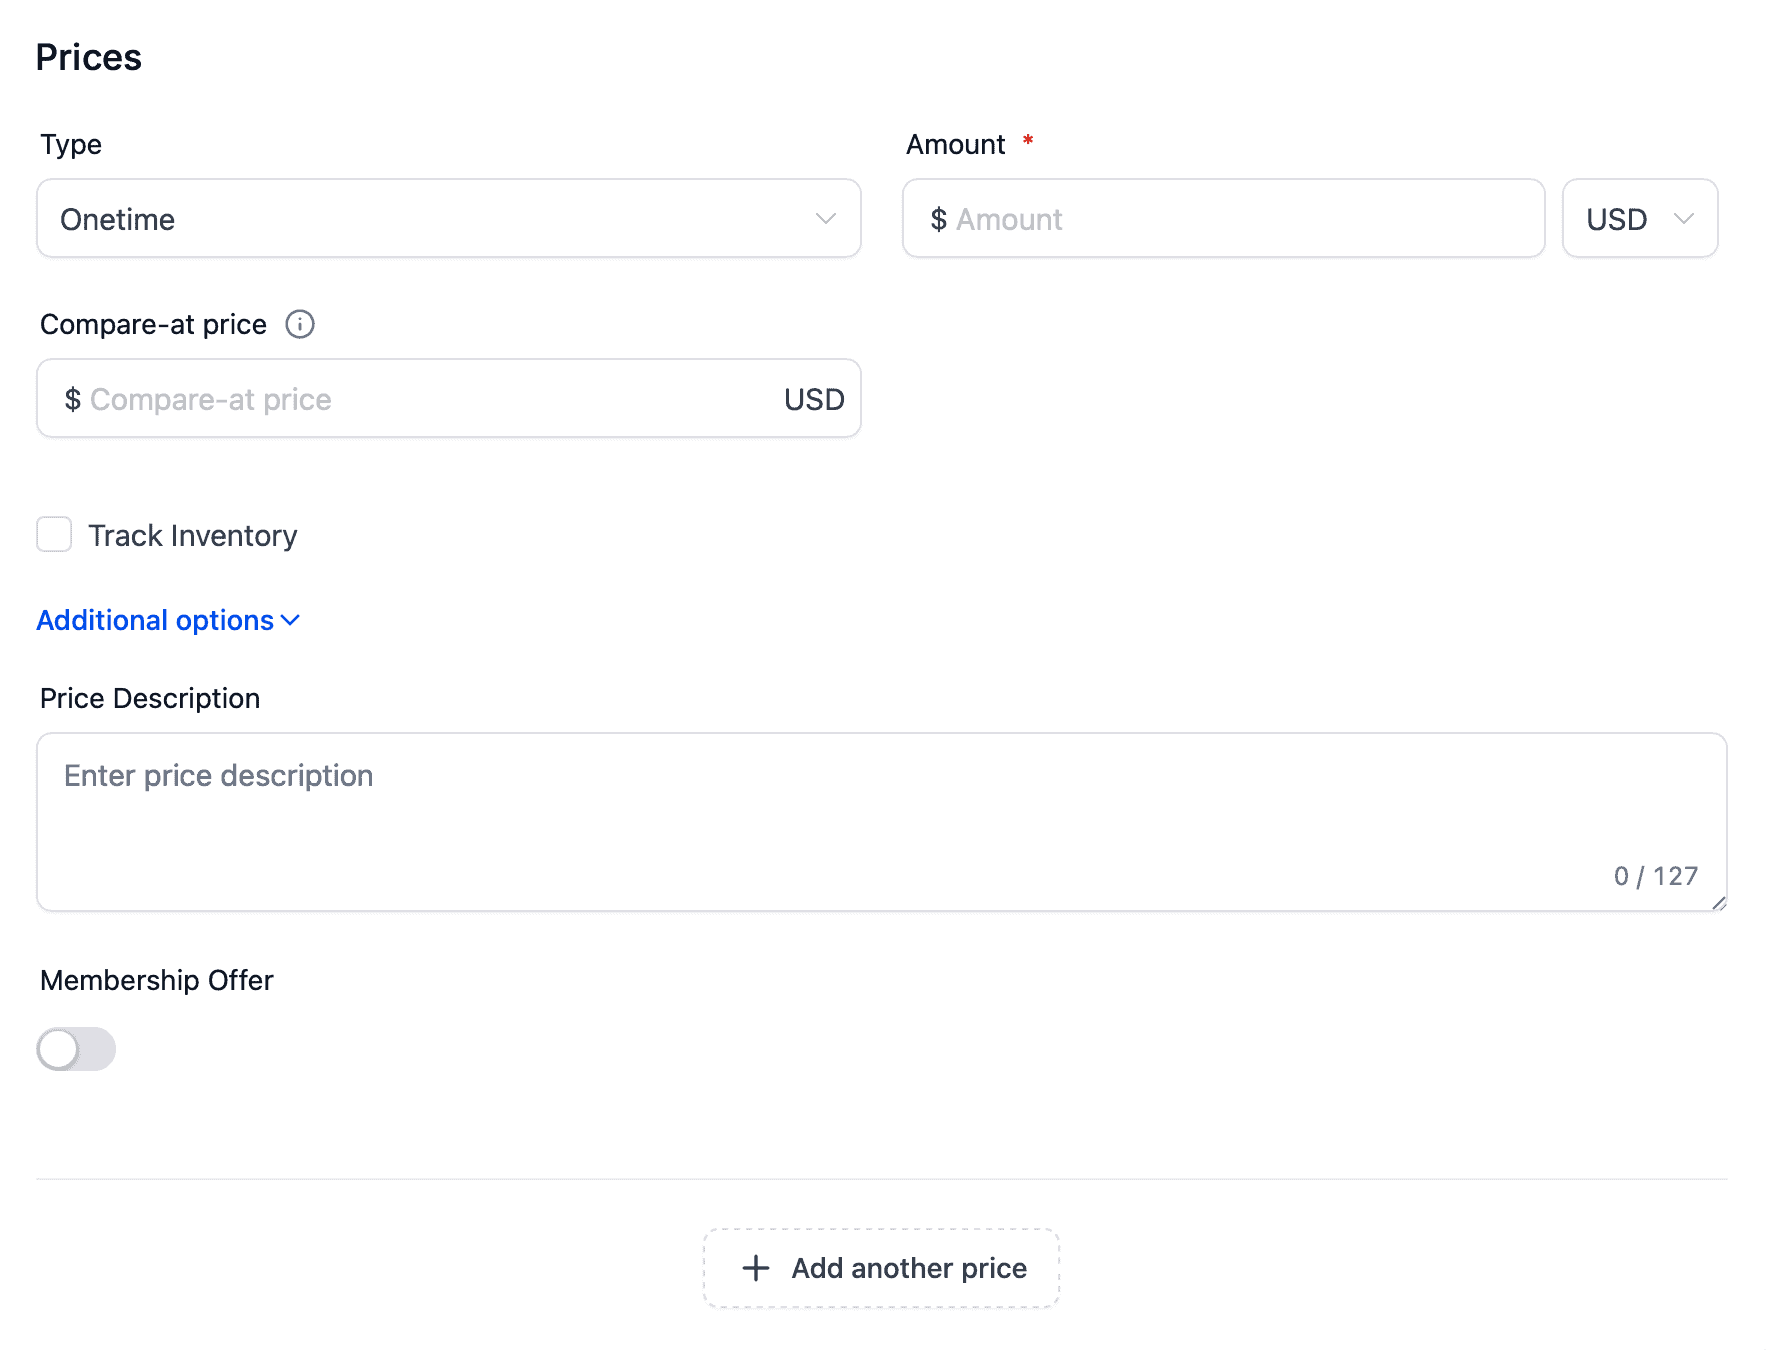
Products can be sold for either One Time pricing (eg. $47 one time) or can be set up for recurring pricing. Examples of Recurring pricing are:
The "Compare At Price" allows you to show a discount or savings - essentially the "Normal Price" would be the compare at price, whereas the price you are selling for would be the actual product price.
Recurring prices have several options. First, they can be set up on various billing periods from daily to yearly:

You can also set a specific trial period - in other words how many days before the first payment is charged. In this example, we give a 7 day trial, which means the first payment will happen on the 8th day:
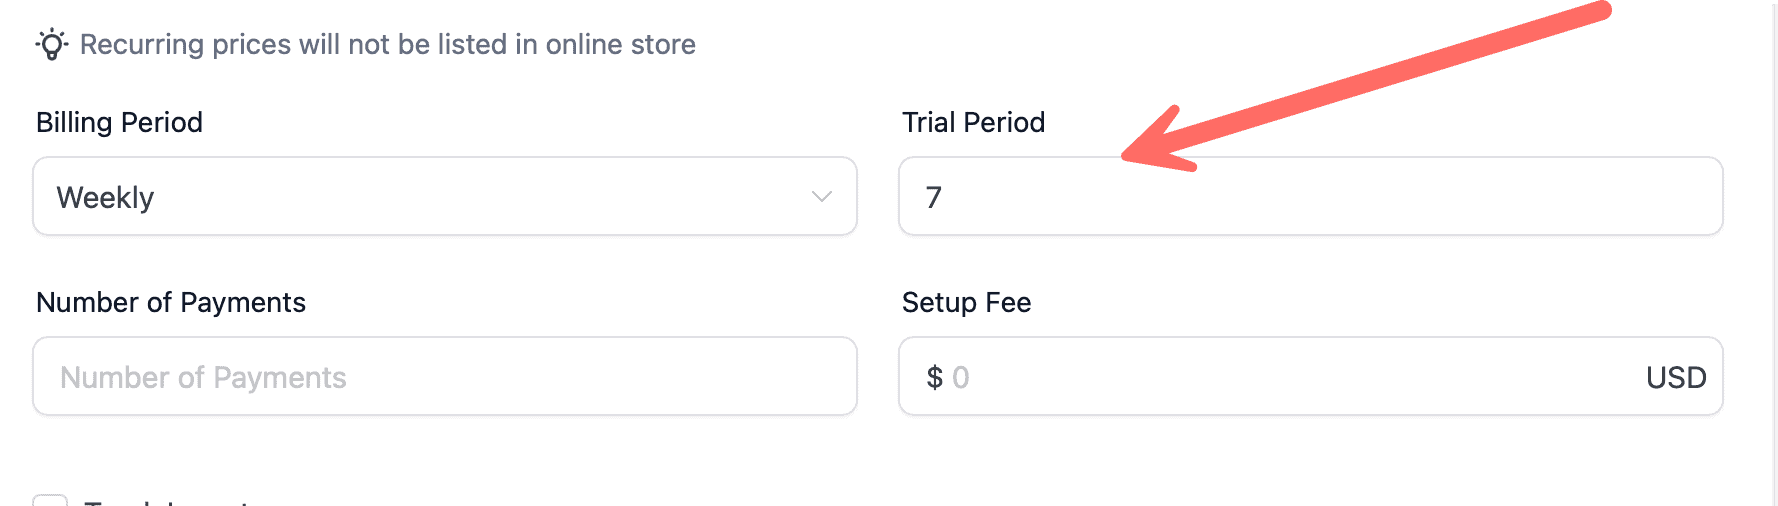
You can choose to set a "number of payments" for the product. If left blank, this will be an ongoing subscription with no end unless cancelled. However, if you'd like to set up a payment plan, you can set a number of payments before the recurring payments stop. In this example, the customer would pay 3 weekly payments to complete the purchase: 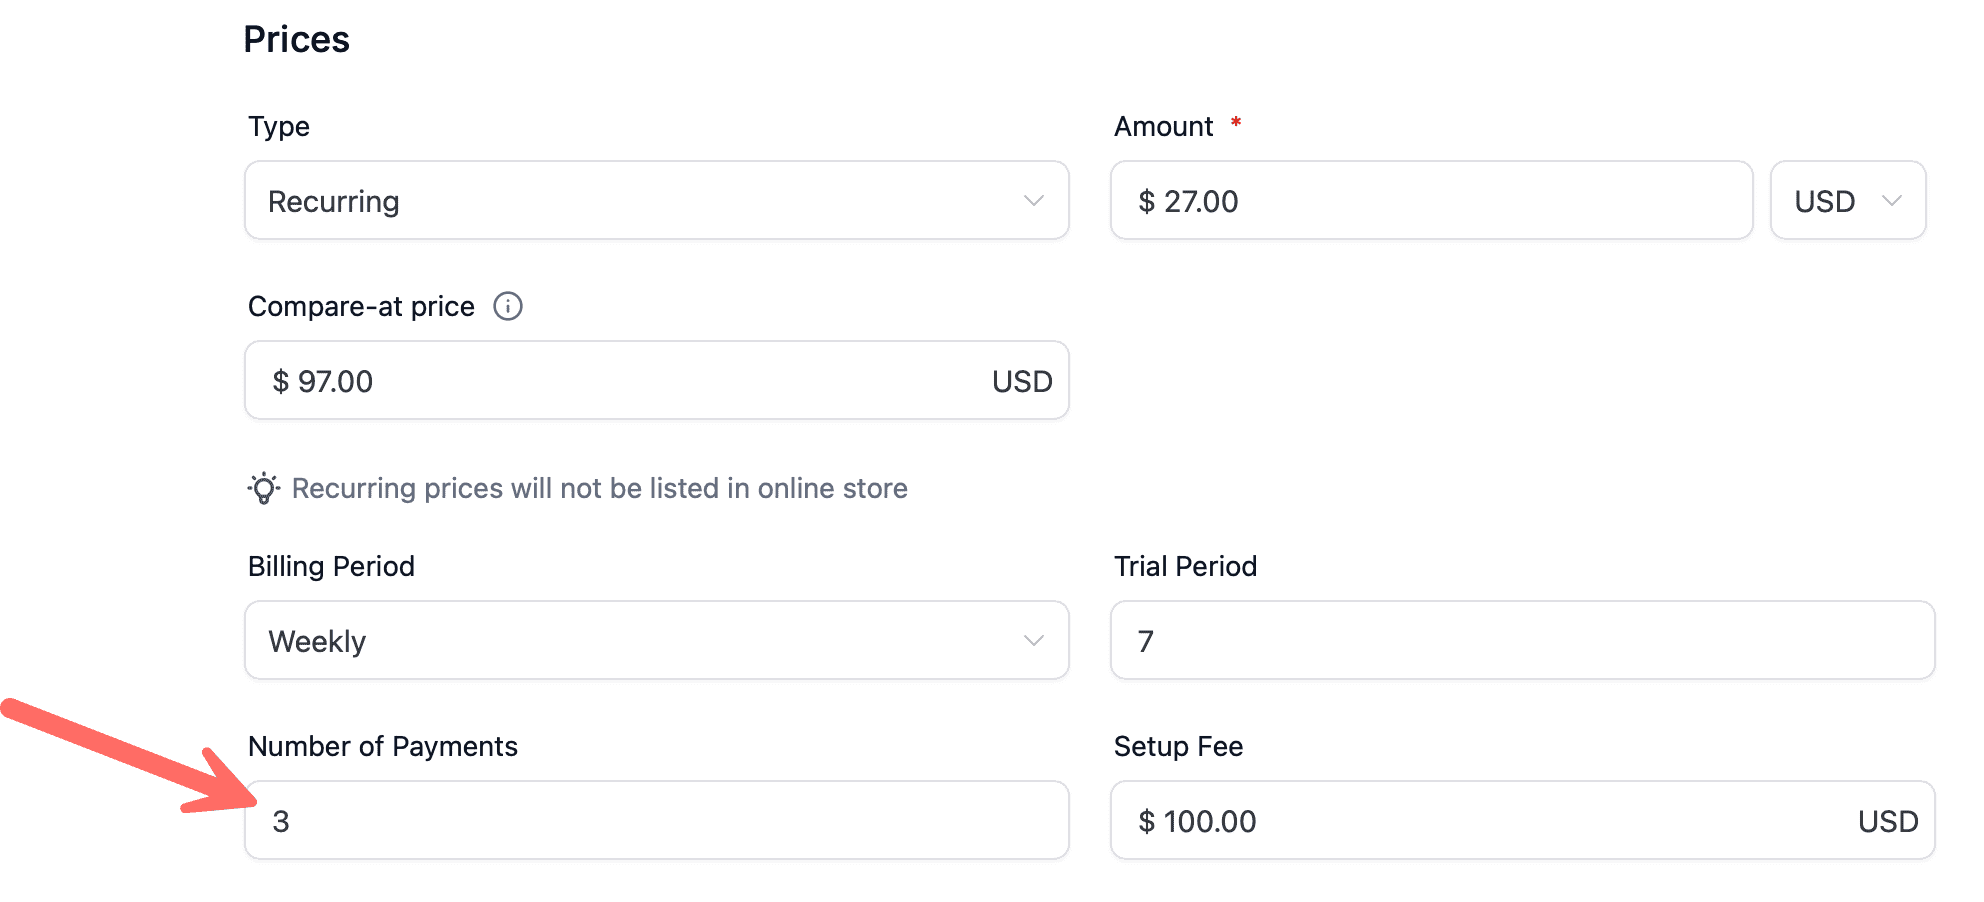
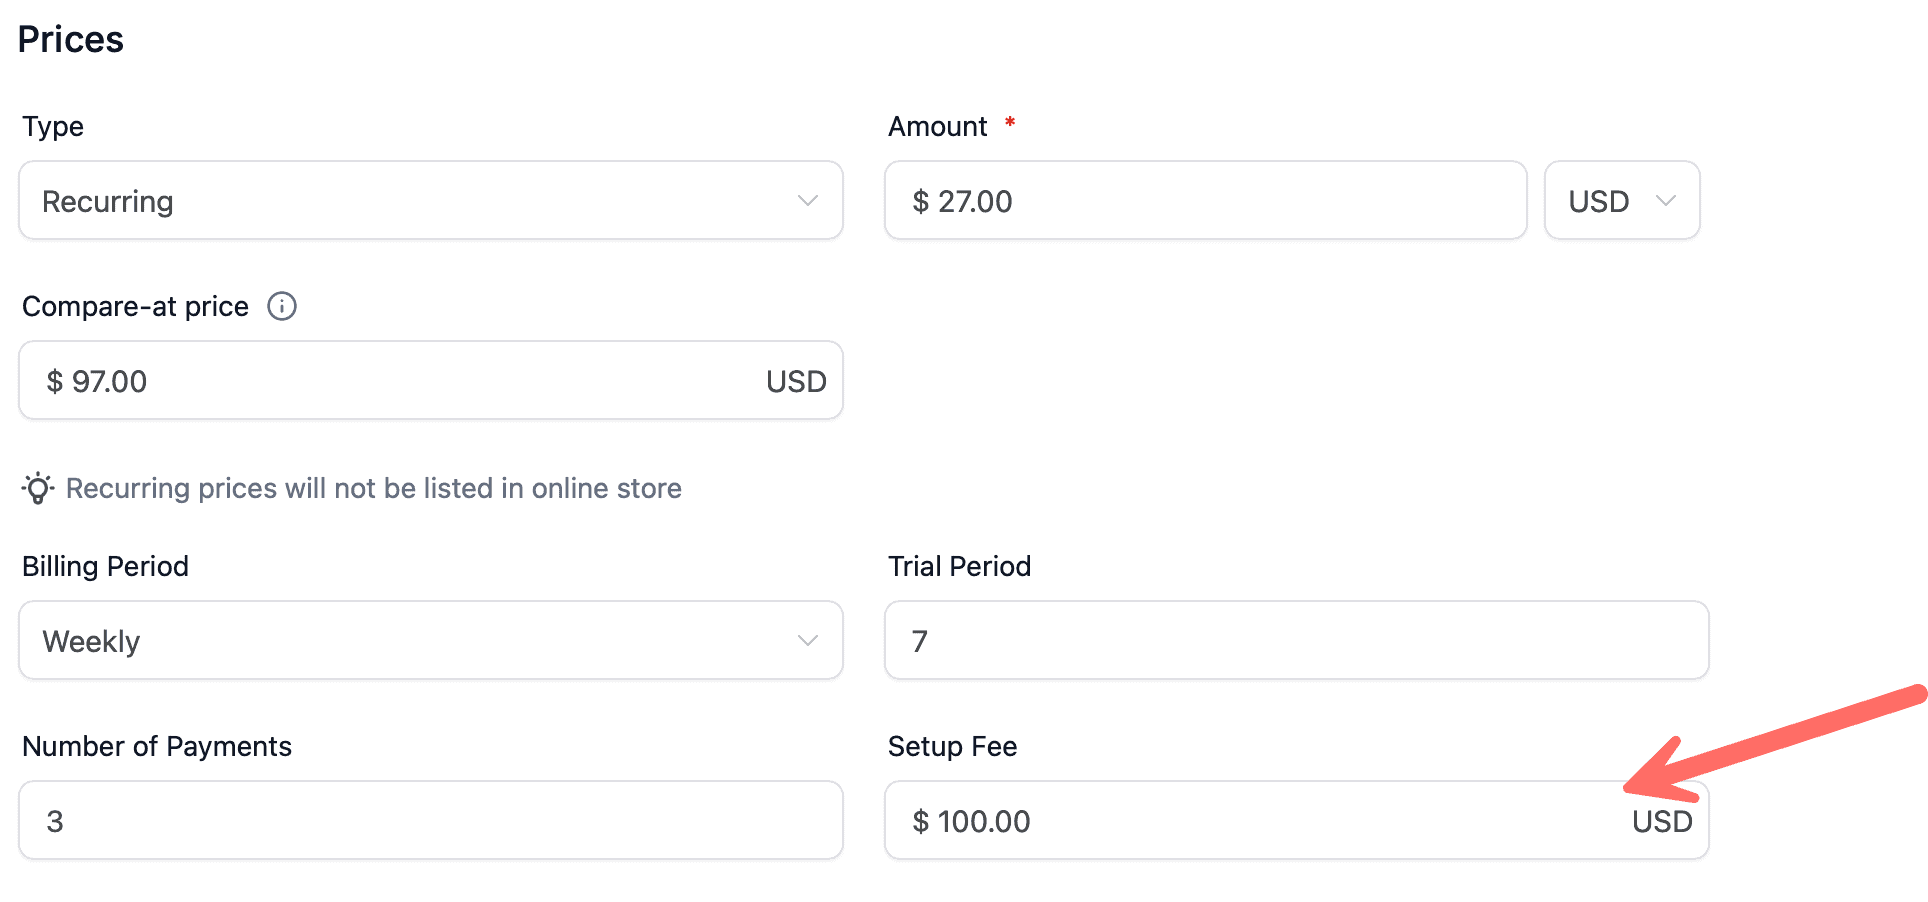
The "Setup Fee" is the initial payment of a recurring payment plan. A nice example is offering a service to someone. Let's say you charge $100 up front to do the work, but then a particular monthly fee to maintain the work, you would select a setup fee of $100:
So in the following example, we are offering a discount on a product which is normally $97 per week. The discounted offer gives a 7 day free trial. After the 7 day free trial, there is a one time setup fee of $100, followed by 3 weekly payments of $27. After the 3rd weekly payment, there are no more charges to the customer:
7. Track Inventory & Additional Options
Freedomkit allows you to keep track of inventory units for your products. Primarly used in selling physical products.
Under "Additional Options" you also have the ability to override the default price description. You can use this option to create customized verbiage to how the product will be charged:

Under Membership Offer you can choose to automatically grant the customer access to your courses / memberships. Simply toggle the membership offer on and select the membership offer you'd like to give access once the product is purchased.

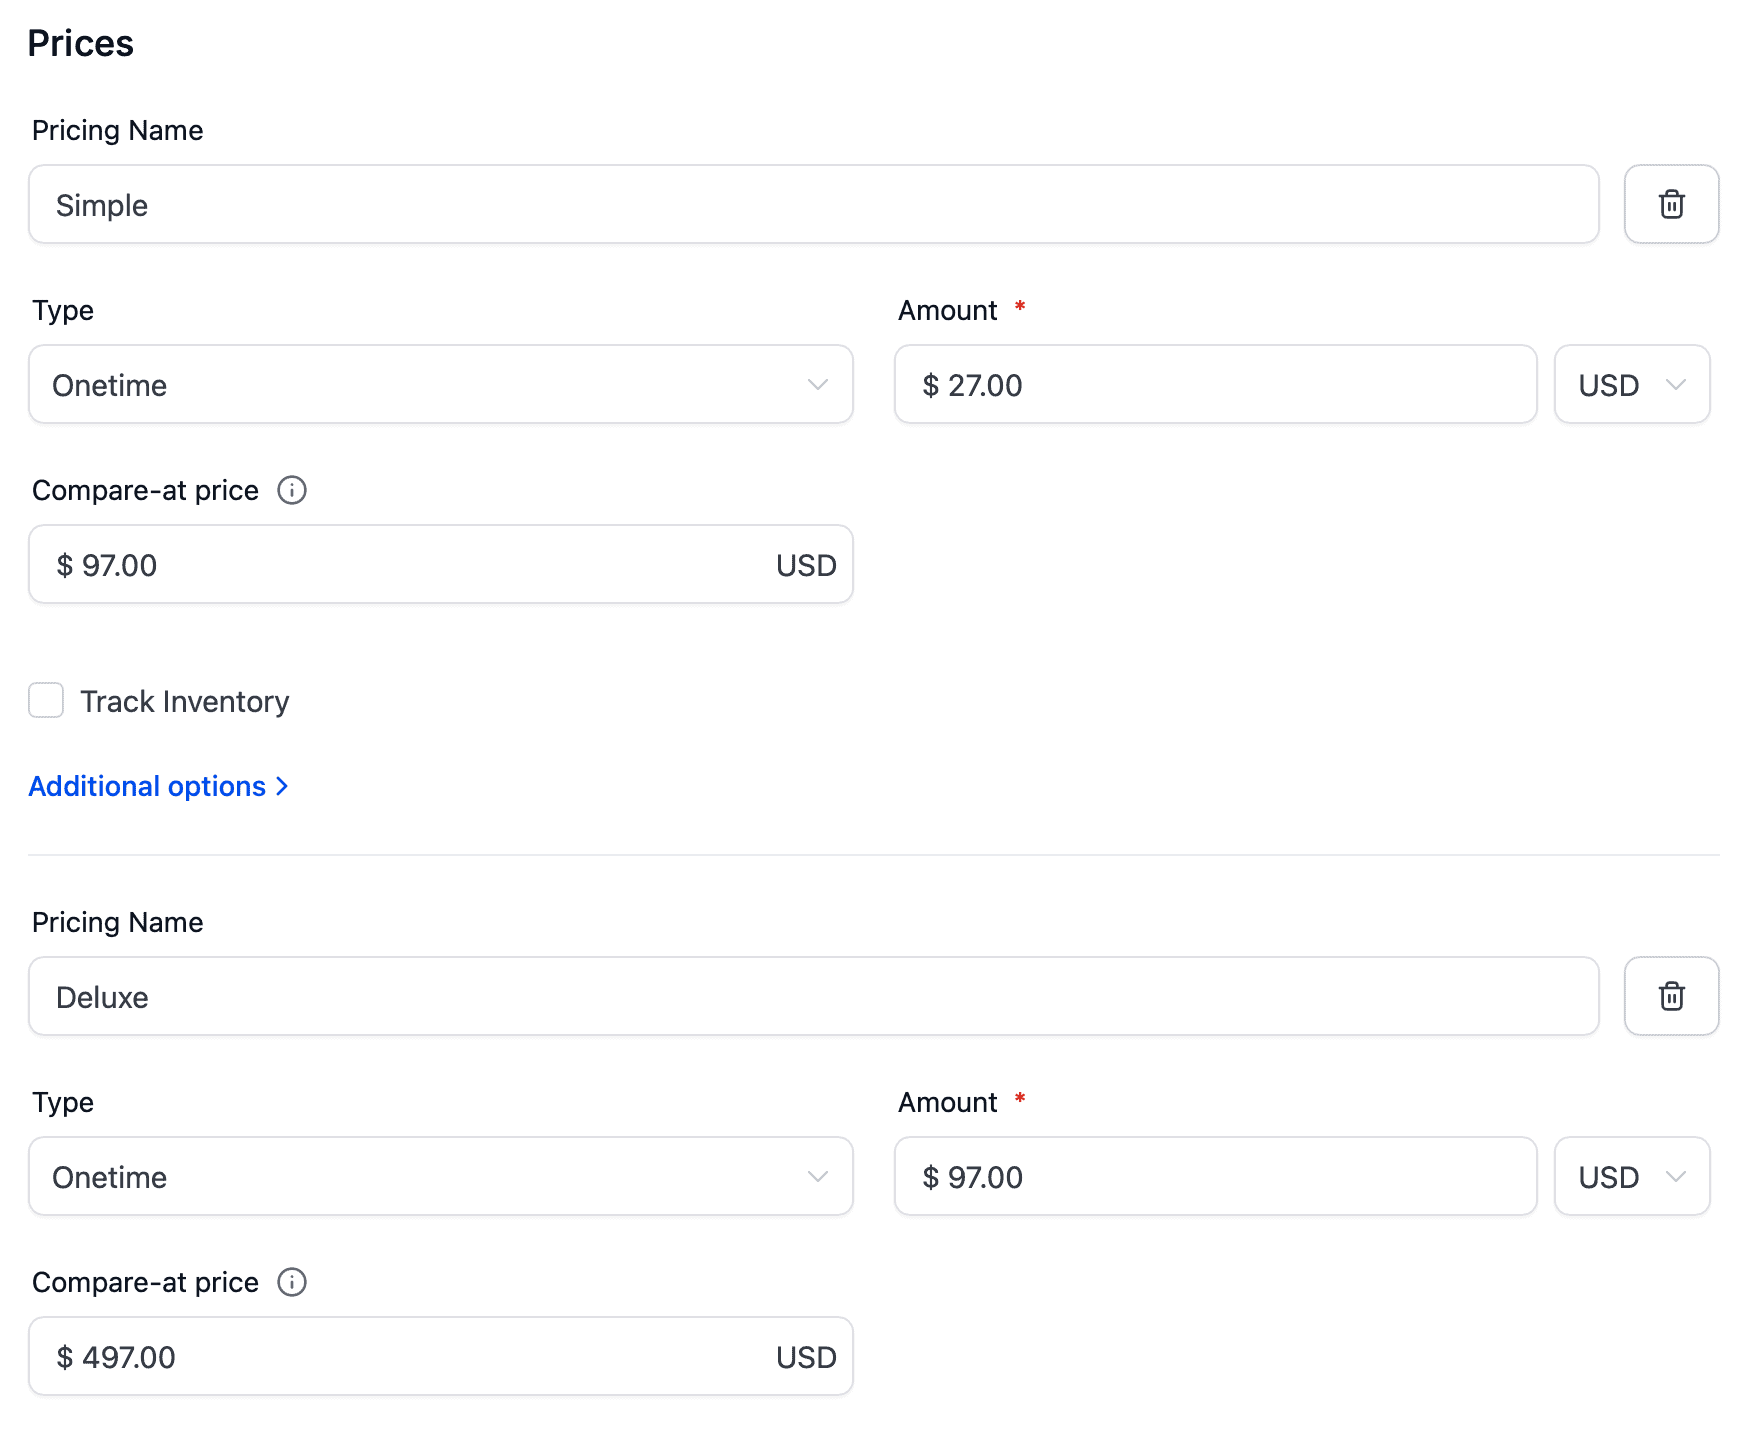
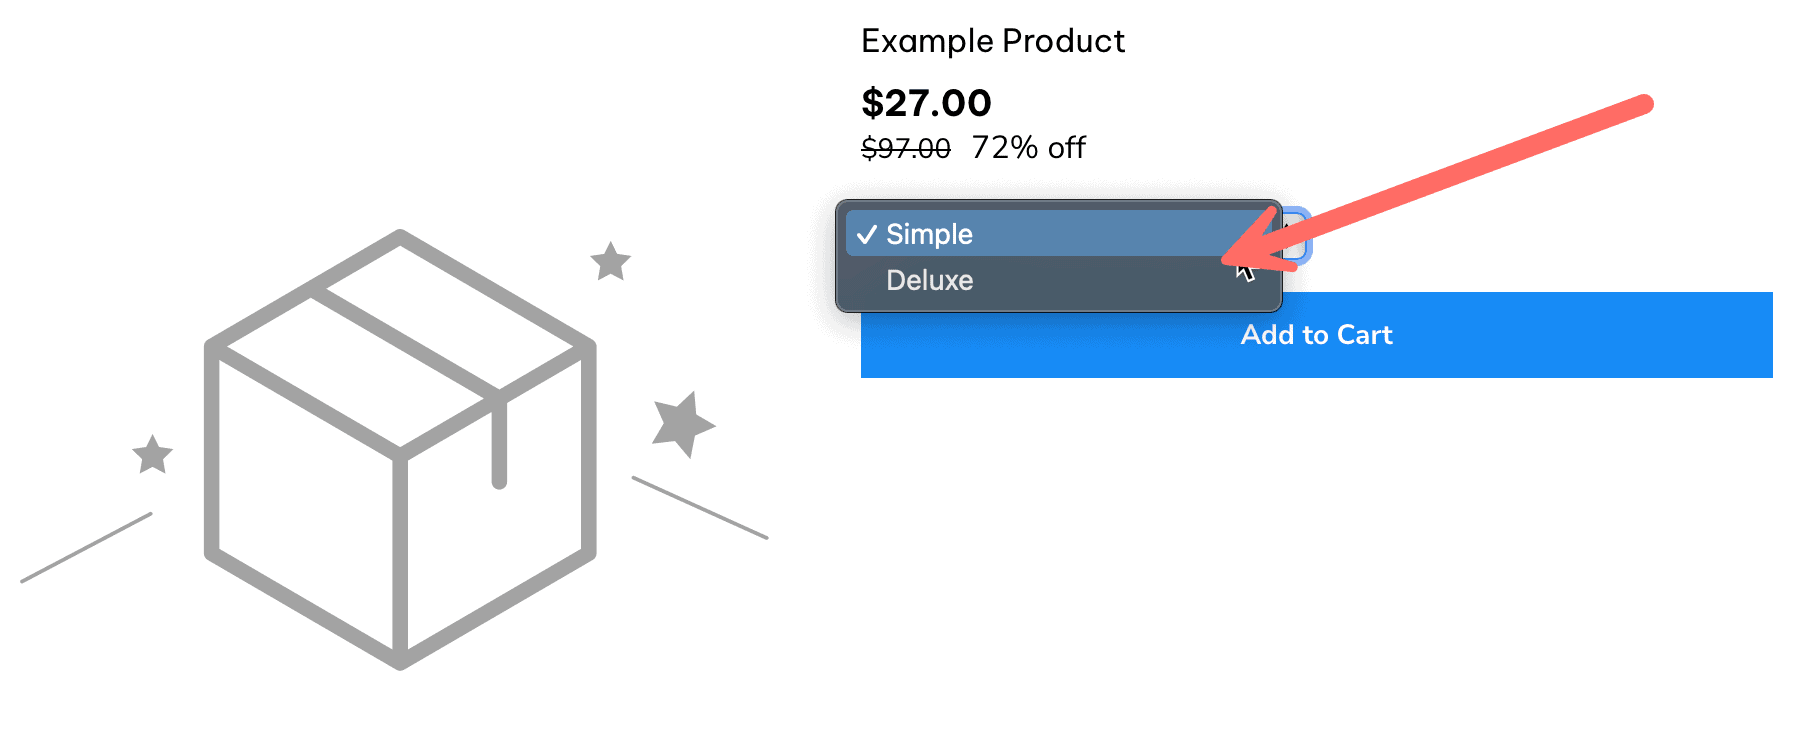
Multiple Price Points
You can also select multiple price points for a specific product:

When you add multiple price points, you can customize each aspect again, giving you great flexibility. Here's an example of a "Simple" vs "Deluxe" pricing options:
These price points are selectable from the front end of the online store with a simple drop down to allow customer to choose desired price point:
Conclusion
Setting up products in Freedomkit is simple! Once created, you'll be able to add your products to your online store, sales funnel, and invoicing processes!